Have you ever wanted to recreate a crafty wood sign that you saw on Pinterest or Etsy? Do you own a small business and want to venture into a new market? Stencil film can help. This film can be used for masking surfaces from wood, canvas, glass, cars, to aircraft. The low-tack adhesives used in stencil films allows you to mask painted surfaces without damaging the paint. It stays in place while you spray or paint your product but can be removed easily.
SignWarehouse sells a few different types of stencil films, including OraMASK 810S and 813 and GAP Spray Mask. This article will give you a brief description of each product and offer some helpful application tips.
There are a few reasons why stencil film is better than regular vinyl for decorating wood blanks. Most sign industry vinyls, including Oracal 651 and EnduraGLOSS have permanent adhesives designed to bond quickly to a substrate and stay in place for years. This is great for vehicle decals and signs. But, if you use a permanent vinyl as a temporary paint masking stencil, the vinyl can leave adhesive residue and even pull up paint. Stencil film will not leave a residue and mentioned earlier, won’t pull up the paint.
OraMASK 813, 810 and the GAP Spray mask are also more economical than outdoor vinyls. You've probably seen pre-made stencils in craft and hobby stores. These are okay, but they tend to have breaks in the designs and lettering. Plus, they're someone else's designs, not yours. Stencil film allows you to create seamless graphics of your own design, so that you can let your imagination soar.
OraMASK 813
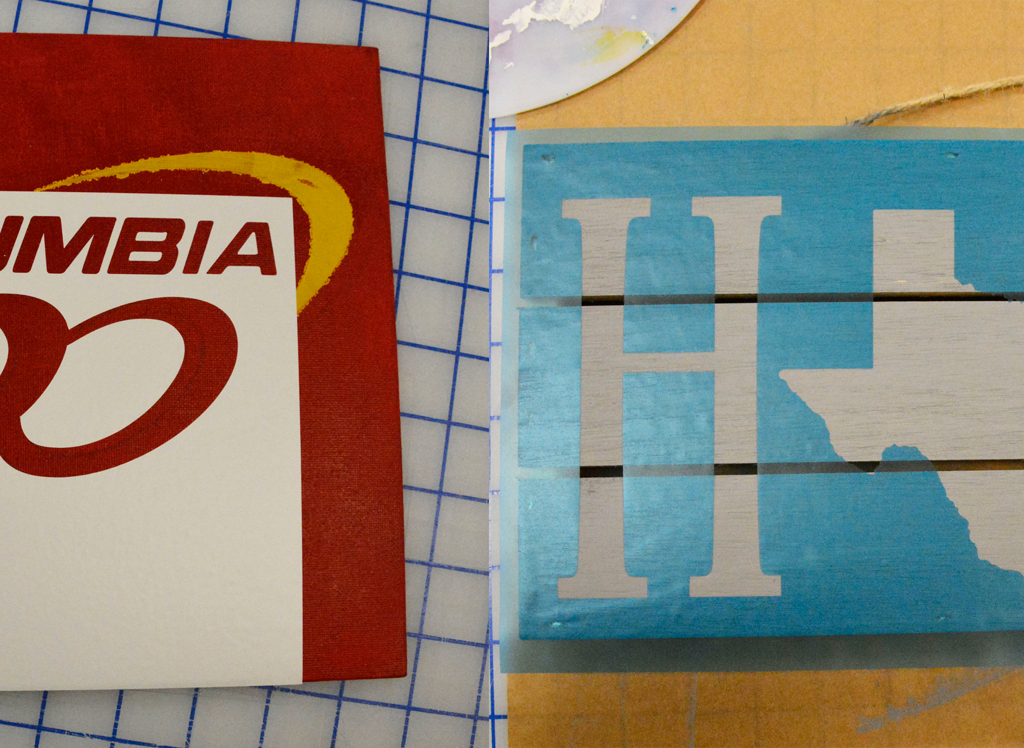
OraMASK 813 is a low-tack, removable vinyl that can stick to any smooth surface. This film is great for water-based and latex paints. It has a blue opaque matte finish which is easy to weed and see your project’s background. OraMASK 813 is great for those craft wood signs from Pinterest and Esty. Wood and canvas are not the only substrates you can use this film on. It’s rigid enough to cover a large area, but flexible to conform to simple curves. You can use your cutter with the same settings you use for cutting regular vinyl. OraMASK is rigid while OraMASK 810S is thinner and more flexible. The 813 had no problem laying down on the wood sign, but when I tried to use the 810S, I could not get the film to stick. OraMask 813 is the better choice for this type of application.OraMASK 810S
Orafol has two different types of 810, 810 and 810S. Both can be used for the similar applications. How do you know which one to use when? The S in 810S is for 'solvent'. It has a solvent-based adhesive which makes it more resistant to exposure to solvent-based paints and stains. 810S is a better choice for automotive and marine applications but not wood signs.
OraMASK 813 has an acrylic or water-based adhesive that works well for most applications, but isn't as resistant to solvents and liquid in general. So it takes longer to bond on wet surfaces and can be weakened by exposure to solvent fumes. This could cause bleeding and a less than satisfactory image. OraMASK 810S has a matte gray, transparent face film. This film can also handle oven curing up to 300° F. This can be useful for when you are painting an object with paint that may need to be heated up or flashed. This application is common in stencil applications like vehicle graphics or decorative gun handles. Even when this film is heated up, it still pulls off easily and cleanly with no residue.
Spray Mask
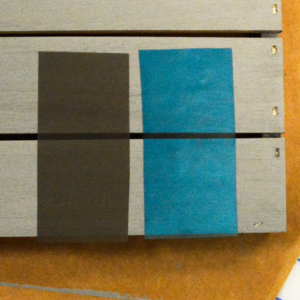
We also sell a spray mask film that has some similar properties and advantages. It's an opaque, matte white matte calendared film. This product's advantage is heat resistance. It can be used in automotive paint mask applications that require baking the paint. The spray mask can handle temperature 200° to 300° F for short periods of time. It works fine with most vinyl cutters, but you'll get your best performance by slowing down your cutter speed, especially if you're cutting an intricate graphics. While I was working with this film, I wasn’t a big fan of how hard it was to see while weeding. OraMASK 813 is a blue film with a white release liner. It's the opposite of ORACAL's white vinyls, which all come on a blue release liner to you can clearly see what's been cut and what to weed. The spray mask is a white film on a white release liner, so it requires a little more attention to weed it correctly.Getting Started
When you start a project, you may want to make a checklist to decided which stencil film is the best for your project. What type of paint are you using, what substrate (wood, canvas, glass, automobile, etc.) are you using? When it comes to substrates, the smoother, the better.
The vinyl stencils will adhere to un-sanded wood and canvas, but the porous nature of the substrate means you may not have a good seal around the edge of the mask. That leads to a bit of a fuzzy edge. I had better results with a sanded wood sign than the canvas I used.
Some people will coat their canvases with a modge pod or clear coat to make the surface smoother. This could be helpful but keep in mind that a coat like that can be glossy or change the finish of the project. Both of my paintings turned out great, but the edge is cleaner and crisper with a smooth wood surface.
Here are the steps I followed for a wood sign. I did two of them, one sanded and one un-sanded. The sanded wood helped with the vinyl sticking and the cleaner edge of the lettering. You can go to your local hardware store to buy sandpaper and it's easy to do by hand.
Using the Stencil Film
After sanding your wood, start by putting down a base coat. This can be a stain or a solid paint. I went with a grey acrylic base paint that I bought from a hobby store. Do not lay the stencil on the base till your paint is completely dry and done curing. Vinyl on uncured paint is a non-starter. This could cause issues with the film not sticking or could pull off paint during removal. When cutting your film, you want to make sure your mirror option is OFF. It’s a little step, but double check yourself and save a headache along with waste.
Also, think about whether you want extra film or make it the exact size of your sign. I did both and I preferred the extra margin of error. Just a little hanging over the edge can help protect your sign from paint getting on the base coat. When you weed your film, you will reverse weed the text. This means you will weed away the letters instead of the negative space inside and around them. The stencil masks out what you want to paint.
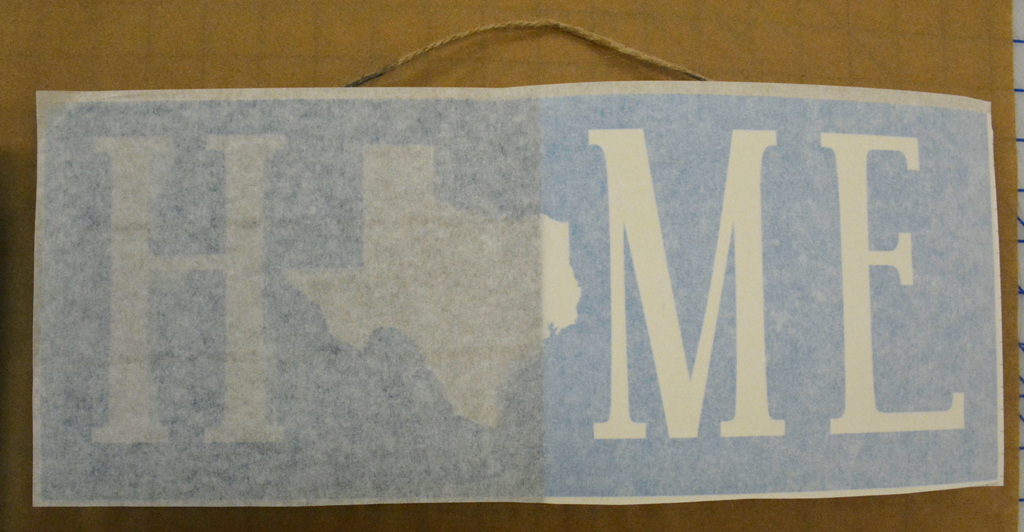
The sign is a decorative home sign with a Texas outline in purple paint. I weeded the letters and the Texas and left the rest. Once the sign is weeded, mask the film with a medium tack transfer tape. When applying the film, pull half the liner off and fold it. This will help line up the text on the substrate. Then I pulled the other half off and squeegee the film. While peeling back the transfer tape, hold a corner of the film to keep it down.
This is where you'll see a big difference between sanded and un-sanded signs. Smoother substrates allow the stencil to bond more securely so that the tape can be removed easily. with rougher or more porous substrates, the stencil film doesn't have much to bond to, so it's harder to remove the transfer tape without the letters coming up with it. On my un-sanded version, the stencil film stuck to the tape, which caused a small tear on the 'M'. Now to the painting stage.
Painting and Removal

This stage is easy and quick. I used the same brand of the grey paint, just in purple this time. While I was painting, I used paint brushes with the canvas and a sponge brush with the wood signs. The sponge brush seemed to have the better outcome of the two options. Another issue with the un-sanded sign was the edges wanted to keep coming up when brushed over. The film can be pulled up while the paint was still a little wet. The un-sanded sign has a bleeding issue with the ‘M’. In the image, the top of the ‘M’ bled over and doesn’t look as clean as the sanded sign
Conclusion
The stencil film is affordable and very useful. I have personally tried to use Oracal 651 as a stencil in the past. Now I wish I could go back in time and use this type of film. It saves a lot of headaches and heartbreak with a decorative sign project.
Some tips to remember are understand and choose the best stencil film for your project. If you need to heat up the project to 250° F, OraMASK 813 will not work for it only handles up to 145° F. The project needs to be as smooth as possible to help create a seal and keep from the paint bleeding. Understand what types of paint that are being used.
If you are looking for more information on stencil film, check out this blog. Learning to use stencil film with your vinyl cutter can free you from the limitations of store-bought stencils and unleash your creativity. And, isn't that what crafting is all about?